Understanding EqualLogic Battery Lifecycle
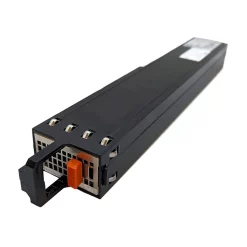
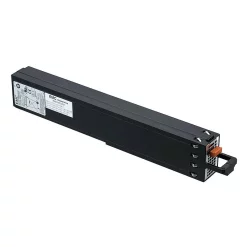
EqualLogic arrays rely on a battery to power their RAID controllers’ cache in the event of a power failure. Over time, the battery’s performance degrades, necessitating a replacement to ensure uninterrupted array operation. Understanding the lifecycle of these batteries can help predict when replacement is necessary. Most EqualLogic batteries last between two to three years; however, regularly monitoring their status is crucial for maintaining optimal performance.
Pre-Replacement Preparations
Before initiating a battery replacement, it is vital to prepare adequately to avoid any unnecessary disruptions:
- Check Firmware Status: Ensure that the firmware of your EqualLogic array is up to date to prevent issues that might occur during the replacement process.
- Backup Critical Data: While a battery replacement is generally a safe process, backing up important data is advisable as an added precaution.
- Documentation: Have the service manual handy, which includes specific instructions for your array model. Always refer to official guidance.
Battery Replacement Procedure
Once preparations are complete, follow these steps to replace the EqualLogic battery:
- Power Down: Although it’s possible to replace the battery without powering down the entire array, it’s safer to schedule downtime if possible. Otherwise, ensure you are in a controlled environment to minimize risks.
- Locate Battery Compartment: Access the RAID controller housing to find the battery compartment. This usually involves unscrewing a panel at the back or side of the array.
- Remove Old Battery: Carefully disconnect the old battery from its connector, taking note of the orientation for the new battery placement.
- Install New Battery: Insert the new battery, ensuring it clicks securely into place without forcing it. Confirm the orientation matches the previous battery’s alignment.
- Secure Panel: Reattach any panels or screws to secure the battery in its compartment.
Post-Replacement Verification
After installing the new battery, take these steps to verify the replacement’s effectiveness:
- Monitor System Logs: Check the system logs to ensure no errors are reported related to the battery installation.
- Run Diagnostics: If your EqualLogic software provides diagnostic tools, use them to confirm the battery is functioning properly.
- Schedule Next Check: Document the date of replacement and plan regular checkups to monitor the battery’s performance. This helps with future planning and maintenance.
Best Practices for Battery Health
Maintaining the health of your EqualLogic battery involves consistent monitoring and care:
- Temperature Management: Keep the storage environment cool and free from extreme temperature fluctuations, which can degrade battery health over time.
- Regular Monitoring: Use built-in alerts in your EqualLogic management software to receive notifications about battery status and health.
- Replacement Schedule: Adhere to a proactive replacement schedule based on manufacturer recommendations and battery performance trends in your usage scenario.
Estimated Replacement Costs
| Component | Cost Range | Notes |
|---|---|---|
| Replacement Battery | $100 – $300 | Varies by vendor and battery type; ensure compatibility. |
| Labor Costs | $0 – $150 | DIY vs. professional installation; DIY is often sufficient. |
| Total Estimated Cost | $100 – $450 | Based on self-installation and vendor pricing. |
Common Issues and Troubleshooting
Despite careful handling, issues may arise during or after a battery replacement. Here are common problems and their potential solutions:
- Battery Not Detected: Recheck connections to ensure the battery is properly seated and securely connected.
- Warning Alerts Persist: Verify that the firmware is up to date and that system logs do not indicate other hardware issues.
- Physical Damage: Inspect the battery compartment for damage if insertion is problematic. If so, consult with a professional technician.


